In-Depth Look at the App
Guide to Research-Grade Temperature Monitoring on the go
Overview
Key Features
- Device Control: Supports connection to a single device at a time
- Data Download: Retrieve your data through the cloud
- Connection Stability: Requires a daily WiFi connection for reliable data retrieval
- Portability: Accessible on any mobile device
- Live Monitoring: Provides real-time data visualization
⚠️ Haven’t downloaded the app or created an account yet? Get started here
Interface Overview
- Device Connection & Set-Up: View real-time status for all connected devices
- Main Dashboard Navigation: Manage core measurements and device settings
- Settings: Oversee firmware updates and device maintenance
Device Connection & Set-Up
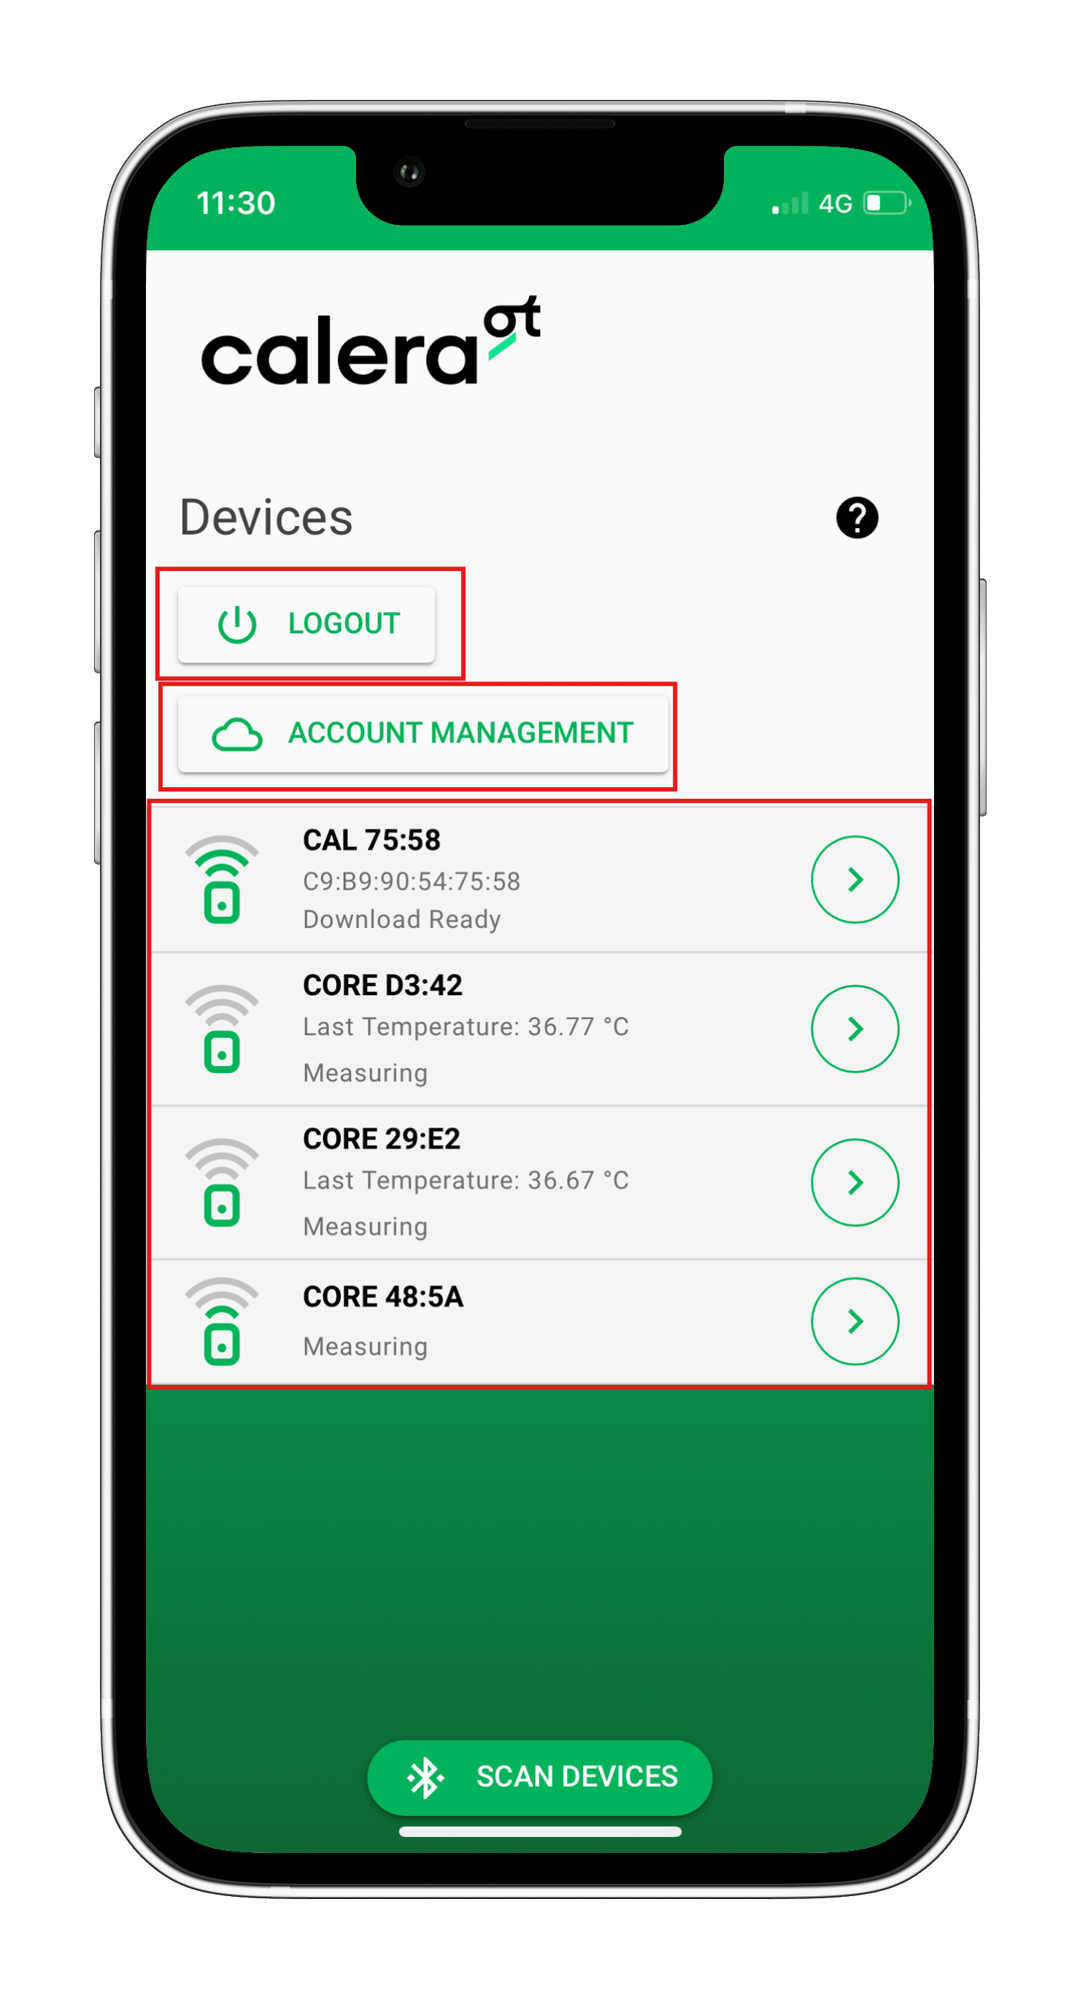
The app automatically scans for nearby devices. You can stop or restart scanning at any time by pressing the green "SCAN DEVICES" button. It will show the devices that are in Bluetooth range.
The center panel displays all detected devices: "CAL" indicates Calera devices, and "CORE" indicates CORE devices, each with a unique ID.
To log out, use the logout option in the app. For account deletion, select account management to visit the webpage and remove your Calera cloud account.
⚠️ When adding a device for the first time, you’ll be prompted to link it to your account. Once added or if you select a device you already own, you'll be directed to the Overview page.

Functionality
Main Dashboard
The dashboard displays real-time data from your device in an easy-to-read graph. Use the buttons above the graph to switch between core temperature, skin temperature, and heart rate views. (Picture 1)
- At the top, you'll see your device's nickname, ID, and battery status.
- Click the Settings icon in the top right to adjust device settings or start a new measurement.
- At the bottom, toggle between "Live" for real-time data and "History" for previous recordings.
Settings
You will find :
- At the very top a textbox that will change the sensor name. (Picture 2)
- User Settings: Here you can save the personal settings, which can be used to identify the individual who is wearing the device. (Picture 3)
- Alert: Enable an alert for when certain temperature values are reached or exceeded (Picture 4)
- A switch option to change the temperature units from Celsius to Fahrenheit
- Standby mode switch which can be used to help save a device’s battery :
- If allowed, the sensor automatically stops measuring when no skin contact is detected after about 10 minutes
- If not allowed, the sensor continuously measures
- Algo mode: This option allows you to choose between the different algorithm modes. (Picture 5)
- To correctly choose an algorithm, please get in touch with us (info@caleraresarch.com). As the chosen algorithm determines the accuracy of the CBT values, it’s crucial to select the correct one based on your use case.
- Heart rate monitor: This menu will help you select and pair/unpair a heart rate monitor from your device. You will need first to scan for the nearby monitors before pairing one. (Picture 6)
- Update firmware: With this menu, you will be able to download the latest version of firmware and its algorithm.
- About: Here you can find multiple information about your CALERA device, mainly: (Picture 7)
- The CALERA app version
- The CALERA device’s firmware version
- The CALERA device’s BLE address (MAC address)
- The CALERA device’s ANT id
- The CALERA device’s battery level


